It takes time to build skill with baking. Firstly you need a great oven, that actually keeps its temperature, when I first started baking, my oven used to lose temperature during cooking and I wondered why my cakes would be overcooked on the outside and under cooked on the inside. Lots of practice, lots of air and a good oven and you will be producing great bakes in no time. Decoration takes a little bit longer to master. So as I haven’t taken pictures of my previous cakes, I am starting from scratch!.
Chocolate, Ginger and Marmalade Cake
This is a sticky, marmalade cake, with a kick of ginger. I iced this cake for a special occasion, but you can also use this cake without the icing. If you do not ice this cake, it is a good idea to wrap and leave the cake for a couple of days, as the stickiness increases and the flavour expands.

- 125G Lactose Free Margarine
- 100G Dark Chocolate
- 300G Orange Ginger Marmalade
- 150G Caster Sugar
- 2 Eggs (Whisked)
- 150G Self Raising Flour
- 2 tablespoon cocoa powder
- pinch salt
- 2x 7 inch tins, greased
- Oven pre heated to 180C (160G Fan)/350F

- In a bowl over a heated saucepan of water, melt the chocolate and margarine
- Once melted, take the bowl off of the heat and add the marmalade, cocoa powder, caster sugar and salt
- Add the eggs to the cooled mixture
- Next add the sieved flour and mix until blended
- Pour the mixture into your pre greased tins
- Bake 45-50 minutes
- Once cooked, allow to cool for 10 minutes before turning out onto a wire rack
- Make the buttercream, whilst the cakes are fully cooling
- Buttercream: Mix icing sugar and melted chocolate, thick enough to be able to apply to the cake, If too thick, add a little margarine
- Once cakes are cooled, put some marmalade on one half of the cake and some of the chocolate buttercream on the other half, put cakes together.
- Apply frosting (1st buttercream layer), put cake in the fridge to set for 30 minutes
- Apply second layer and decorate
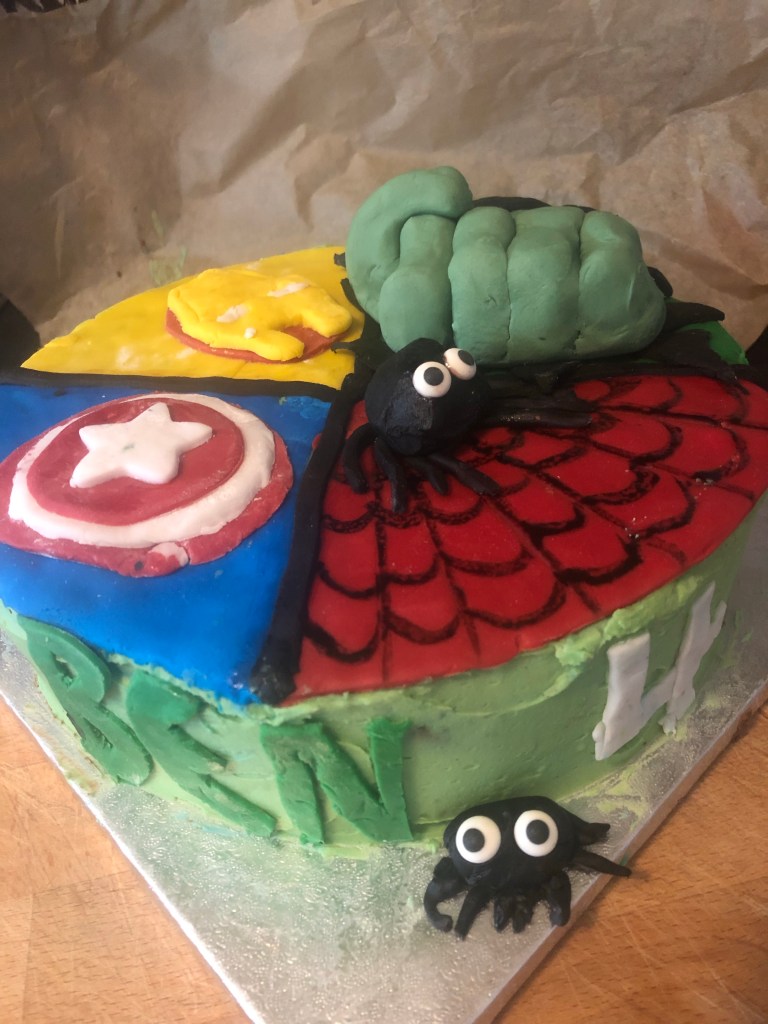
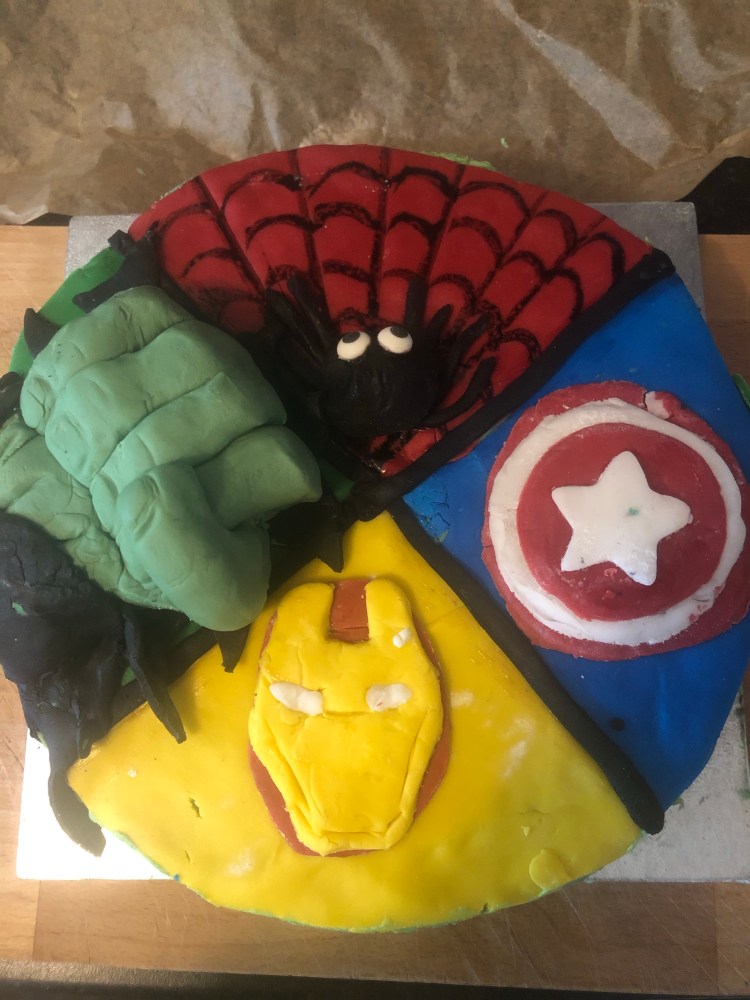
Chocolate Action Cake
I made this cake for a friend’s little boy. The cake needed to be sturdy enough to hold the fondant decorations. I still added some chocolate so the cake has a great chocolate flavour. It was really fun to make and actually quite easy, but it does take a long time. I recommend you bake the cakes a few days before and freeze. It is so much easier to add frosting whilst frozen. Also helps to plan the overall time you have to make the whole cake.

- 230G Butter (or vegan butter alternative)
- 230G Sugar (130G caster and 100G light brown)
- 200G SR Flour
- 1 tspn instant coffee added to hot water (size of an espresso) or a shot of espresso
- 1 tsp Baking powder
- 1 tsp Bicarbonate of soda
- 1 tsp Vanilla extract (I always use vanilla bean)
- 4 Eggs (whisked)
- 75G Milk Chocolate
- 40g Cocoa powder
- For the two BUTTERCREAM Layers:
- 250G Butter
- 500G Icing sugar
- 75G Chocolate
- 20G Cocoa powder
- 1 tsp Vanilla
- Grease two 9inch tins
- Preheat oven to 160c/140c fan. Cook for 30 minutes
1. Mix the butter and sugar together in a bowl and set aside. Add the vanilla extract. You can use just caster sugar for this, but the cake is a lot more flavoursome if you use half brown.
2. Break the chocolate in separate heatproof bowl and melt chocolate over pan of boiling water. Add the cocoa and mix together. Once melted take off the heat and let cool a little. You can add the coffee to this mixture. The coffee is only to enhance the flavour of the chocolate, the cake will not taste of coffee.
3. Sift the flour into a separate bowl and add all the dry ingredients: bicarb, baking powder, salt (1tsp)
4. Slowly add a little egg, flour and chocolate to the butter mixture, a little at a time and whisk together.
5. Split the mixture into the two baking tins. Cook for 30 minutes
6. Once cooked, fully cool down, before wrapping in greaseproof paper and cling film and putting in the freezer. I used tins with removable bases, so that I could just leave the cake on the base to put in the freezer.
7. Once ready to make the cake, take out the freezer and cut the top to make the cake flat (whilst frozen). Also add the first buttercream whilst frozen.
8. I made two buttercreams. Chocolate and green vanilla. I used the chocolate buttercream on the inside of the cake and for the first layer over the cake. Then I put back in the fridge to cool, for approximately 30 minutes. Then add the next layer and put back in the fridge for another 30 minutes. Then add the final layer (so two layers of the green) and again put back in the fridge. Then do the fondant decoration and keep in the fridge for at least another hour.
9. To make the chocolate buttercream. Melt the chocolate using the same method as above and let cool. Add the butter and icing sugar (half of the butter and sugar above) to a bowl and whisk with the chocolate until blended together. You only want to bring the mixture together, so do not over whisk. It is best to do on a low speed at first, then a fast speed for 30 seconds.
10. To make the vanilla buttercream. Add the butter and icing sugar to a bowl and whisk with the vanilla until blended together. Add the food colourants.
11. Whilst the cake is cooling in the fridge you can make the decorations. You can make your own decisions on how to do this and what characters you want to make!
12. I made a circle the size of the cake on a piece of greaseproof paper and then split into four, which I used to measure out the four sections. Cut out the fondant in the four sections (I bought ready made fondant colours, as it was easier). To add to the cake, use a jam to stick to the cake.
13. I used a paintbrush with food colouring for the spider web. I bought the eyes for the spider. For the hulk hand, just take a slab of green, roll out a little, then make a cut on one side into five, roll the fingers and fold over. The rest of the decoration is just practice! I used a cookie cutter to cut out the circles for a lot of the other decorations. Good luck!! Ensure the cake is airtight once fully made. Keep in the fridge because of the buttercream until about an hour before using.
